


The majority of artists draw people. Original characters, poses, facial expressions, etc. It’s a very popular area of interest, and unfortunately, many people struggle and give up simply because they “can’t draw”, or because “it’s pure talent.”
The truth is that, while some artists are purely talented (along with years of hard work), others become great by practicing. Yes, it takes a while (maybe even years), but the outcome is extremely rewarding.
Many people assume they’ll never prosper when it comes to art, but some give up too easily. If you’re passionate about art, you have to learn the basics, even if they are boring and time consuming.
A crucial part of learning how to draw humans is anatomy. There are tricks to drawing everything, like heads, shoulders, the upper and lower body, legs, etc. Learning anatomy is typically a lengthy process, and it must be taken in steps. I created a tutorial on how to draw male torsos to start your journey.
How to draw a male torso:
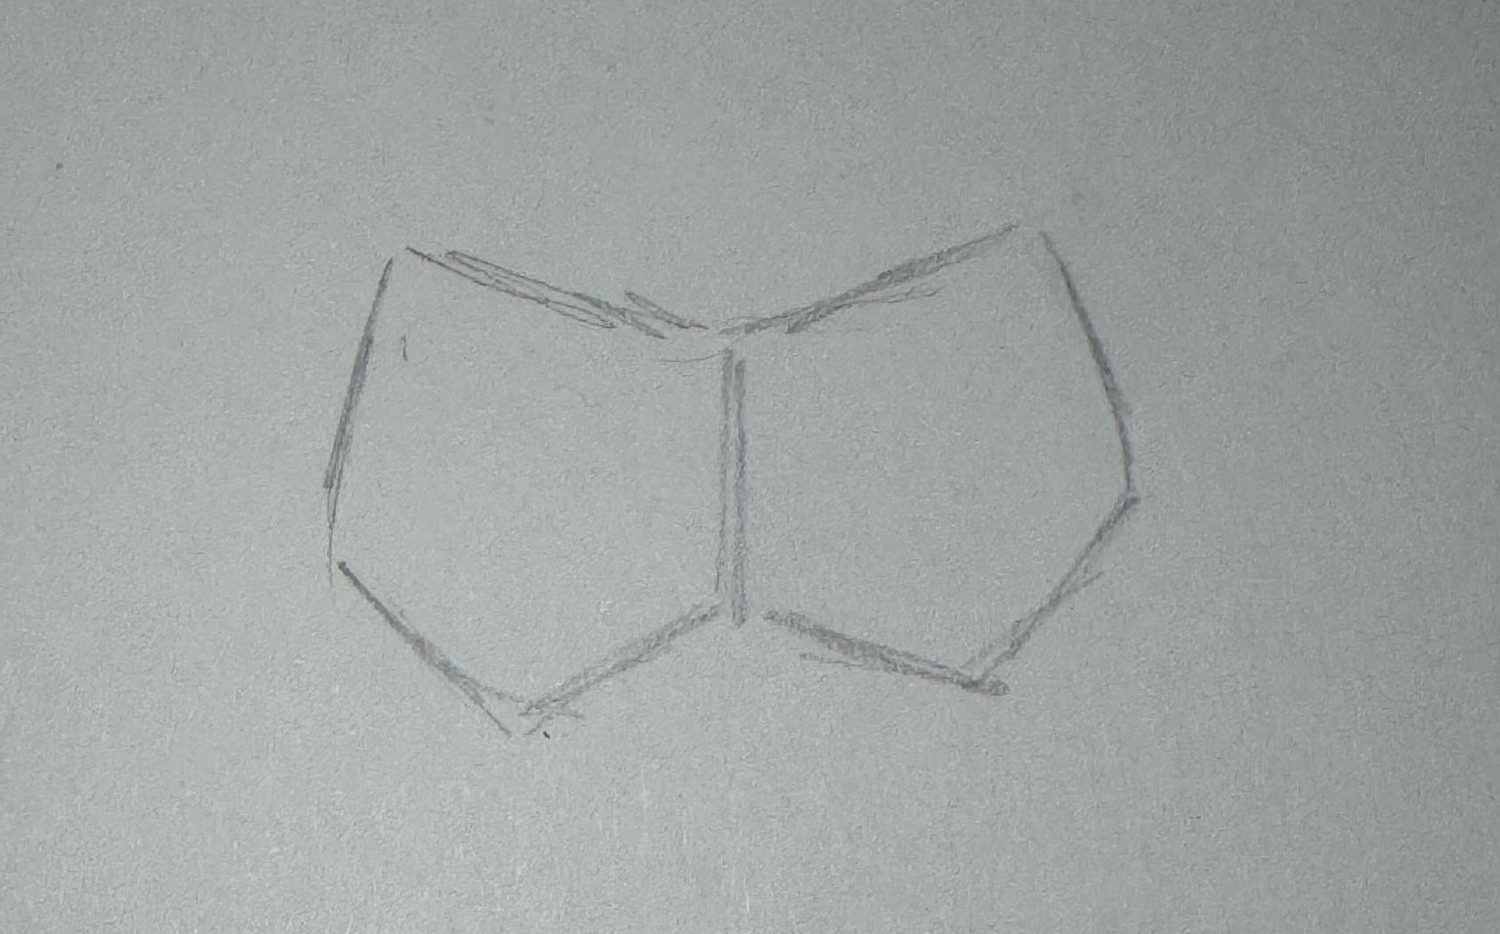
Step 1 – Draw two upside-down pentagons. This is the base of the pectoralis muscles.
Step 2 – Draw two lines. These lines cascade down from the sides of the pentagons, and shouldn’t be completely straight (for the purpose of realism.) Then, draw two uneven “V” shapes just above the ends of the lines just drawn.

Step 3 – Continue down the torso by drawing a curved connecting line that is matching with the edge of the left pentagon. Draw a curved horizontal line that is connected to the vertical line (leave a small dip in the center).

Step 4 – Repeat the process on the right side to achieve the torso shape.

Step 5 – Draw two uneven lines to the sides of a shorter line (hip and abdomen muscles.)

Step 6 – Draw a shorter line above the middle line (navel), and a longer line above that (abdominal).

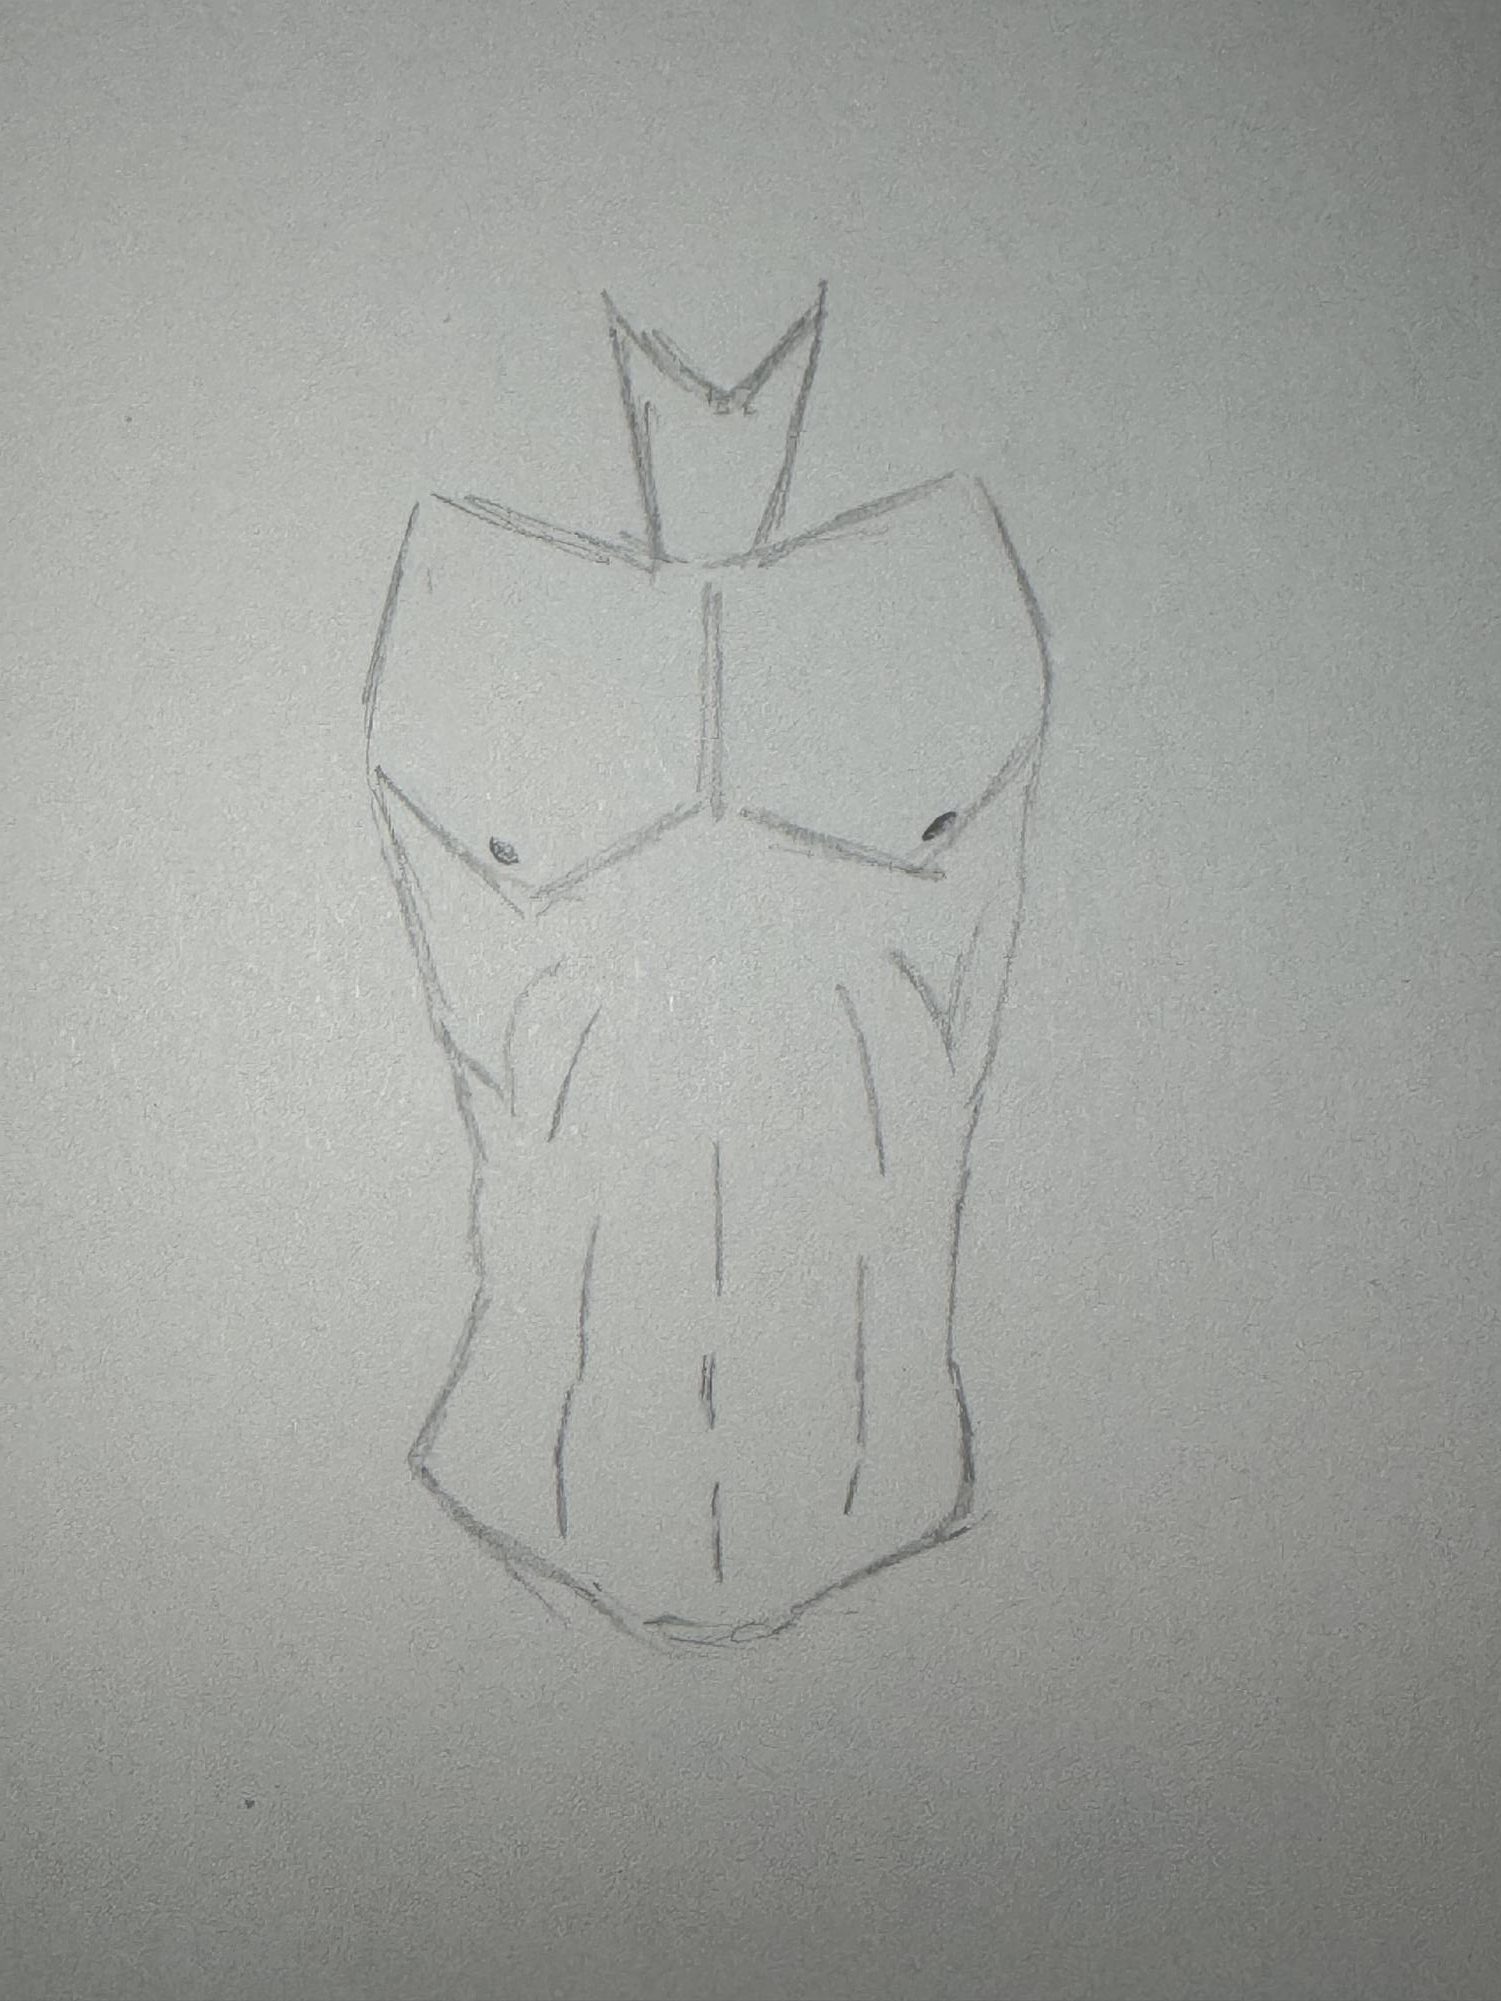
Step 7 – Connected to the top of the two pentagons, draw two lines and an inverted triangle (neck). Fill in two circles near the points of the pentagons (papilla).
Step 8 – Draw a sharp “u” shape connected to the triangle (jaw), along with a rough circle above (skull).
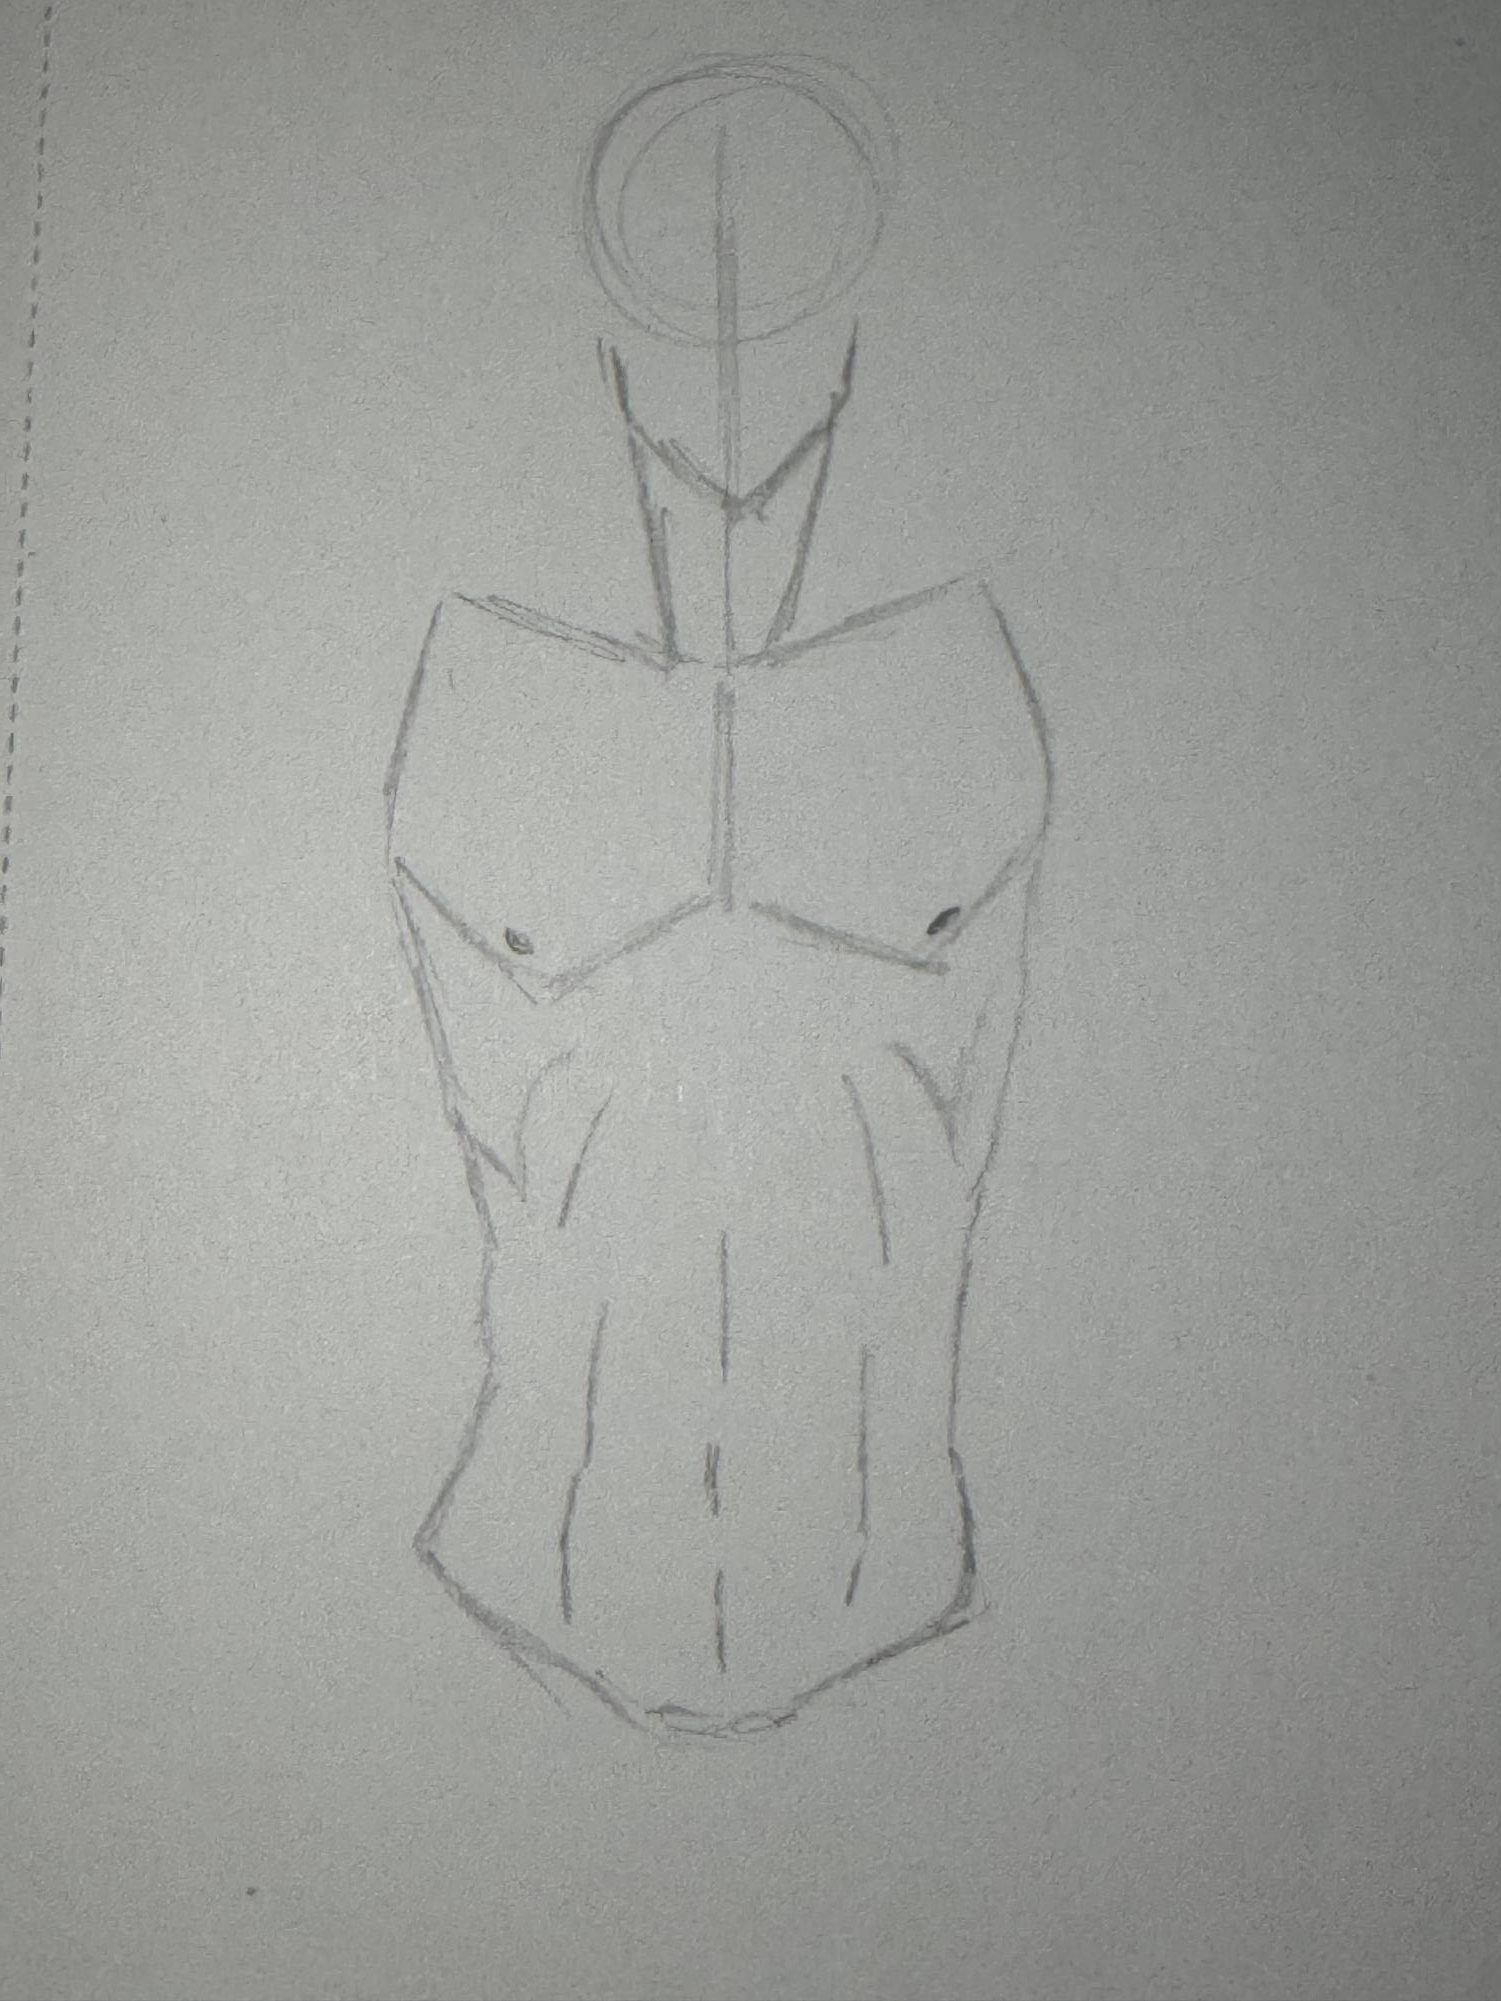
Step 9 – Bolden the circle and connect it to the “u” (complete head). Here, lines of symmetry are helpful if you’re planning to draw facial features.
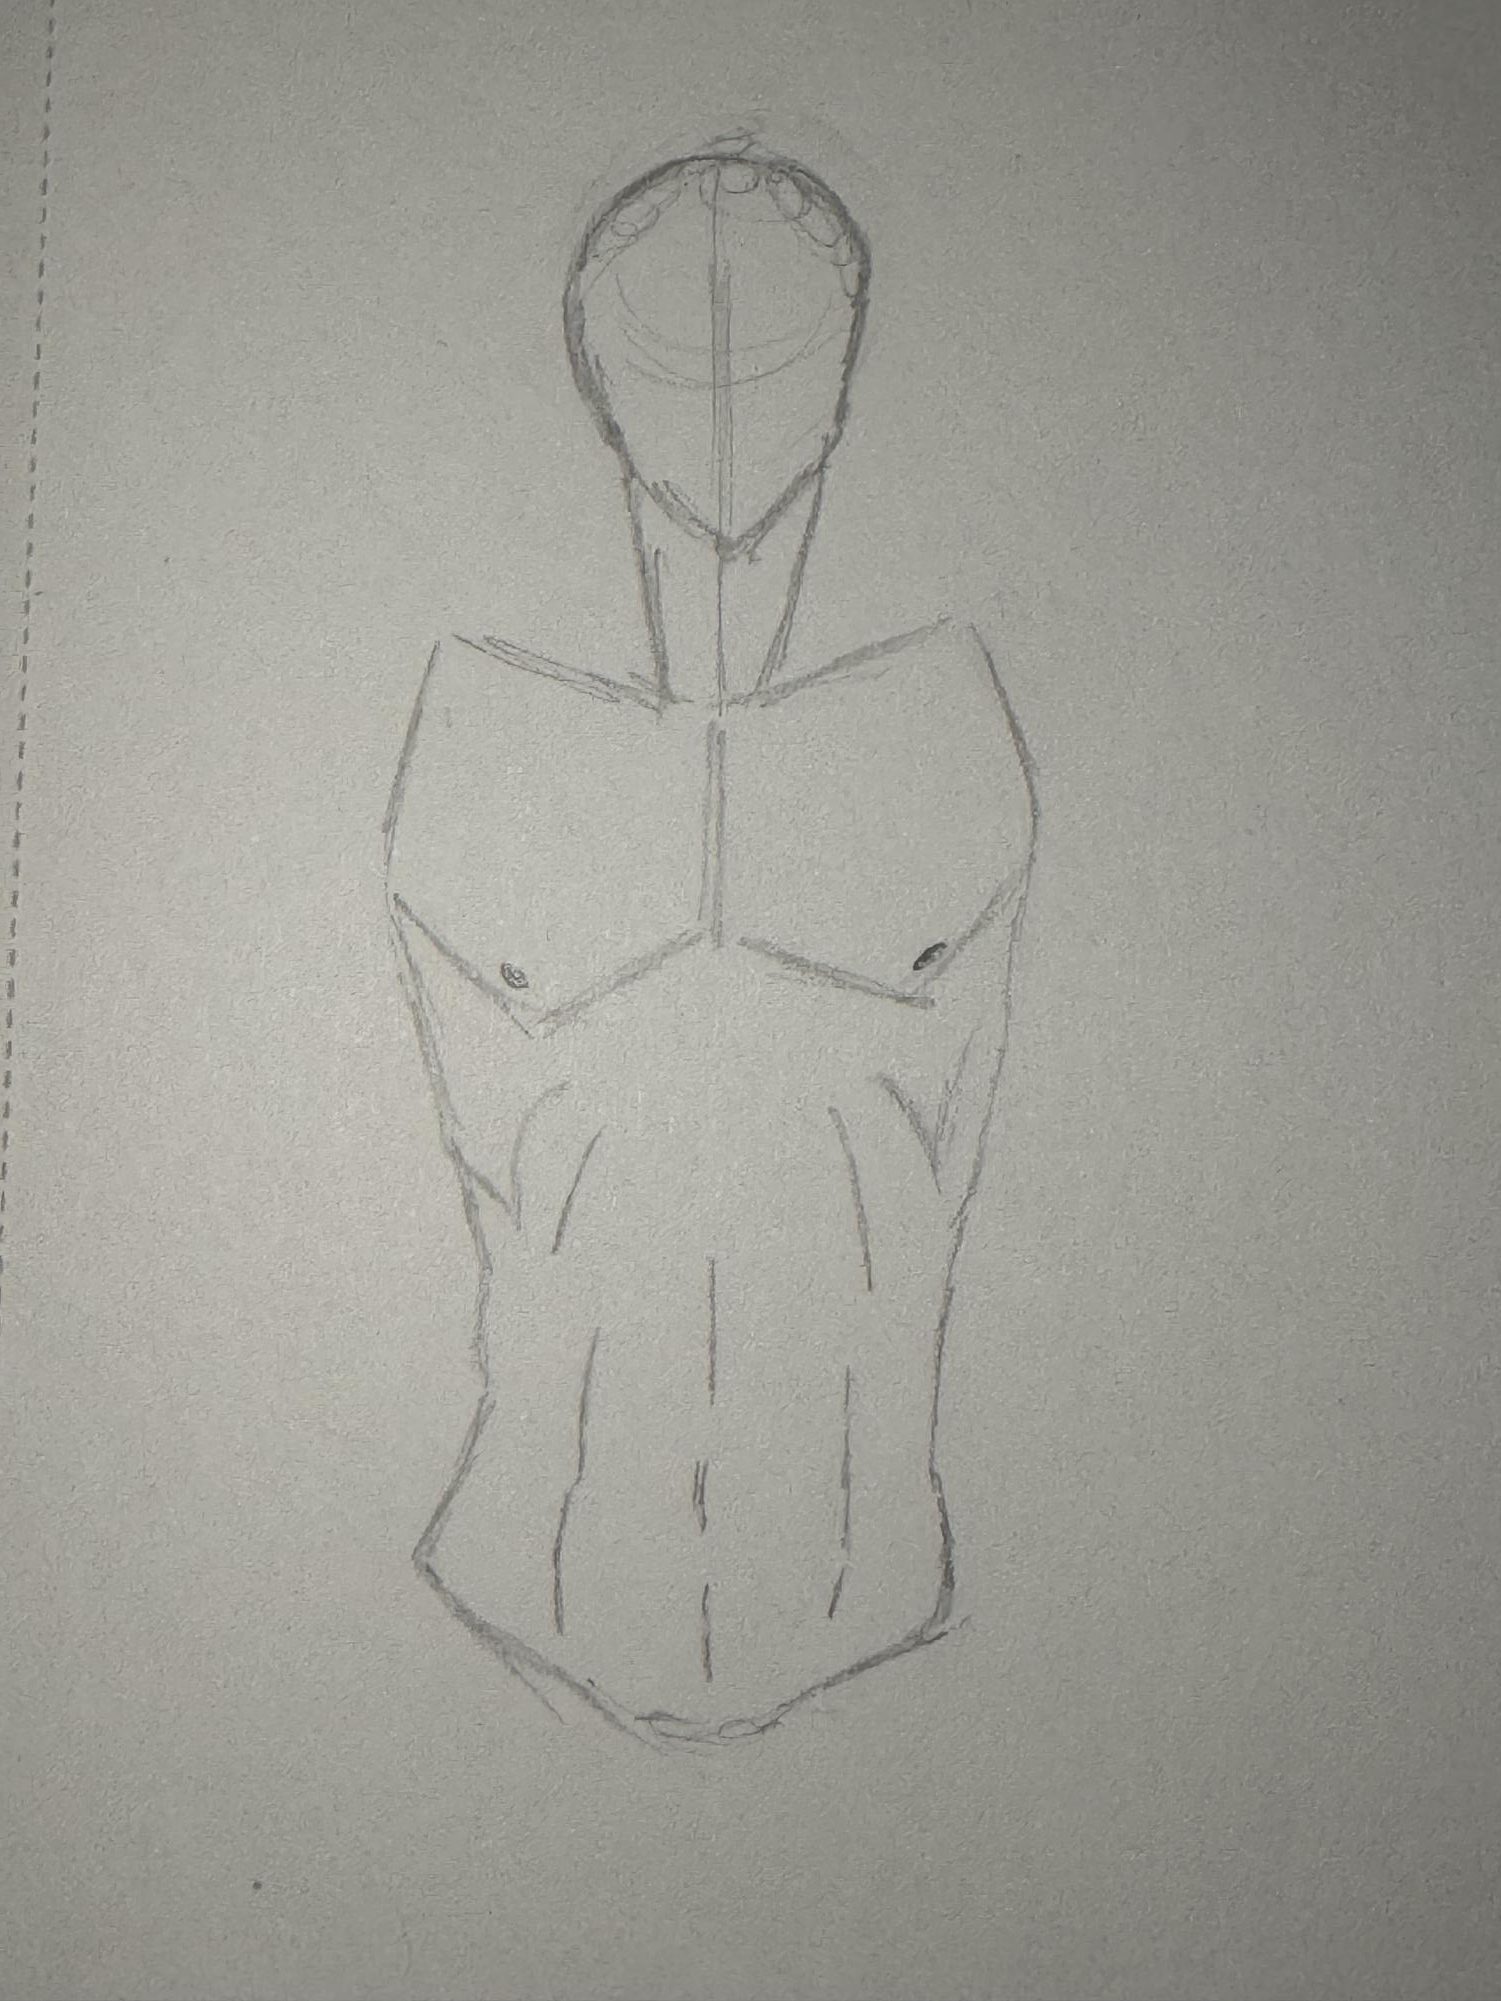
Step 10 – Connect the highest points of the pentagons to the neck lines to create the shoulders.
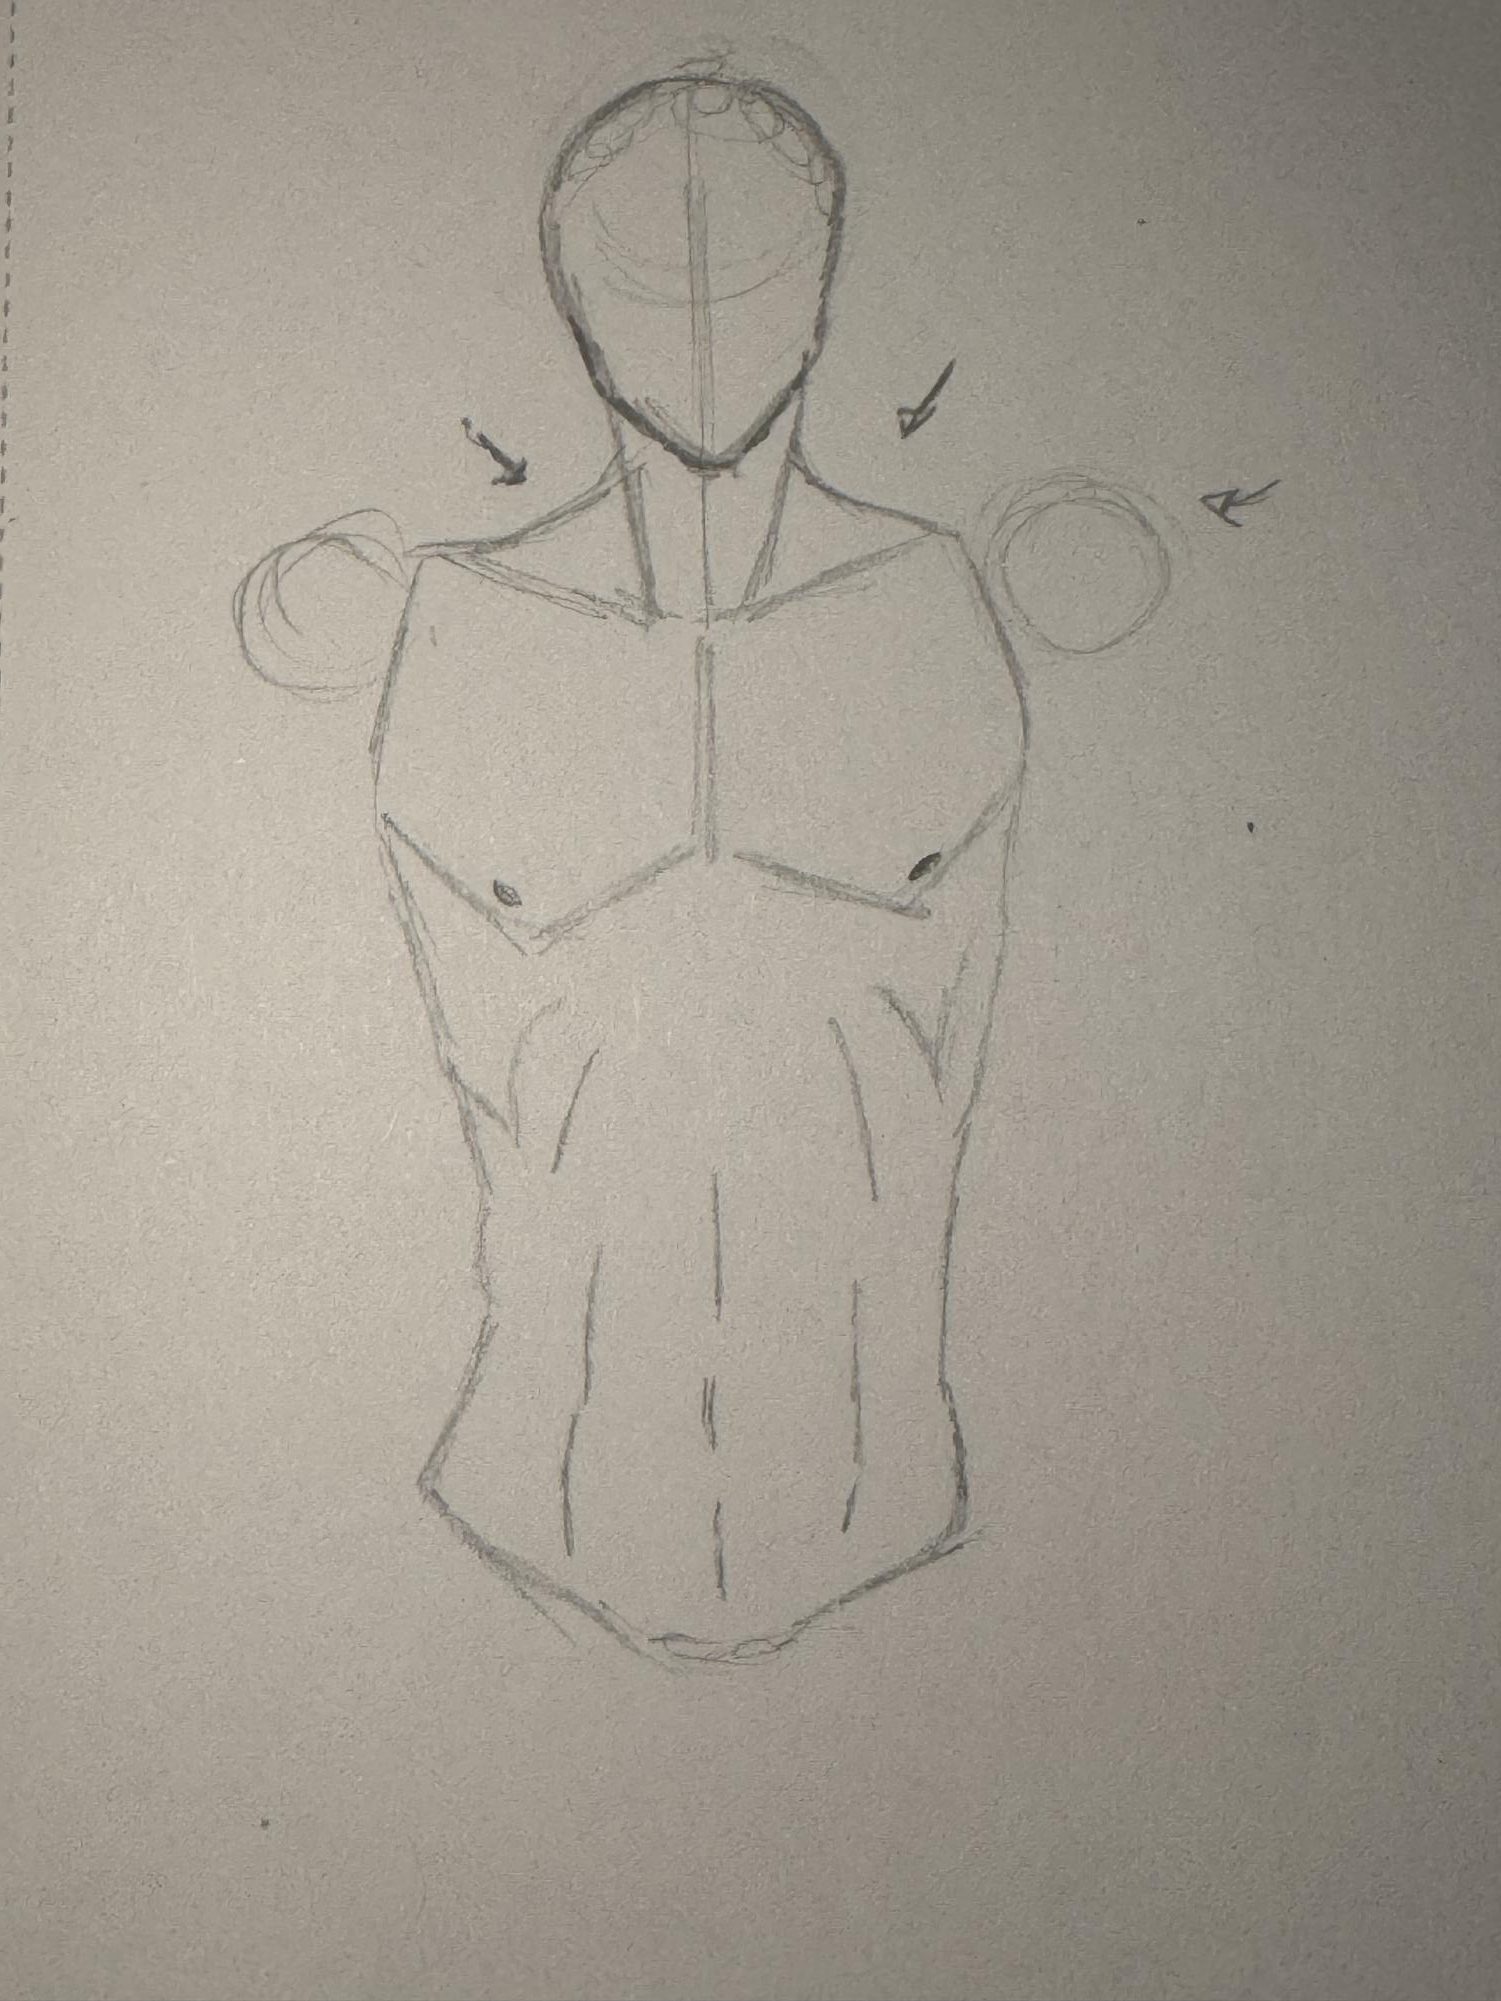
There are many tips to assist artists in drawing various parts of the body as explained previously. As an artist, here are some of my favourites:
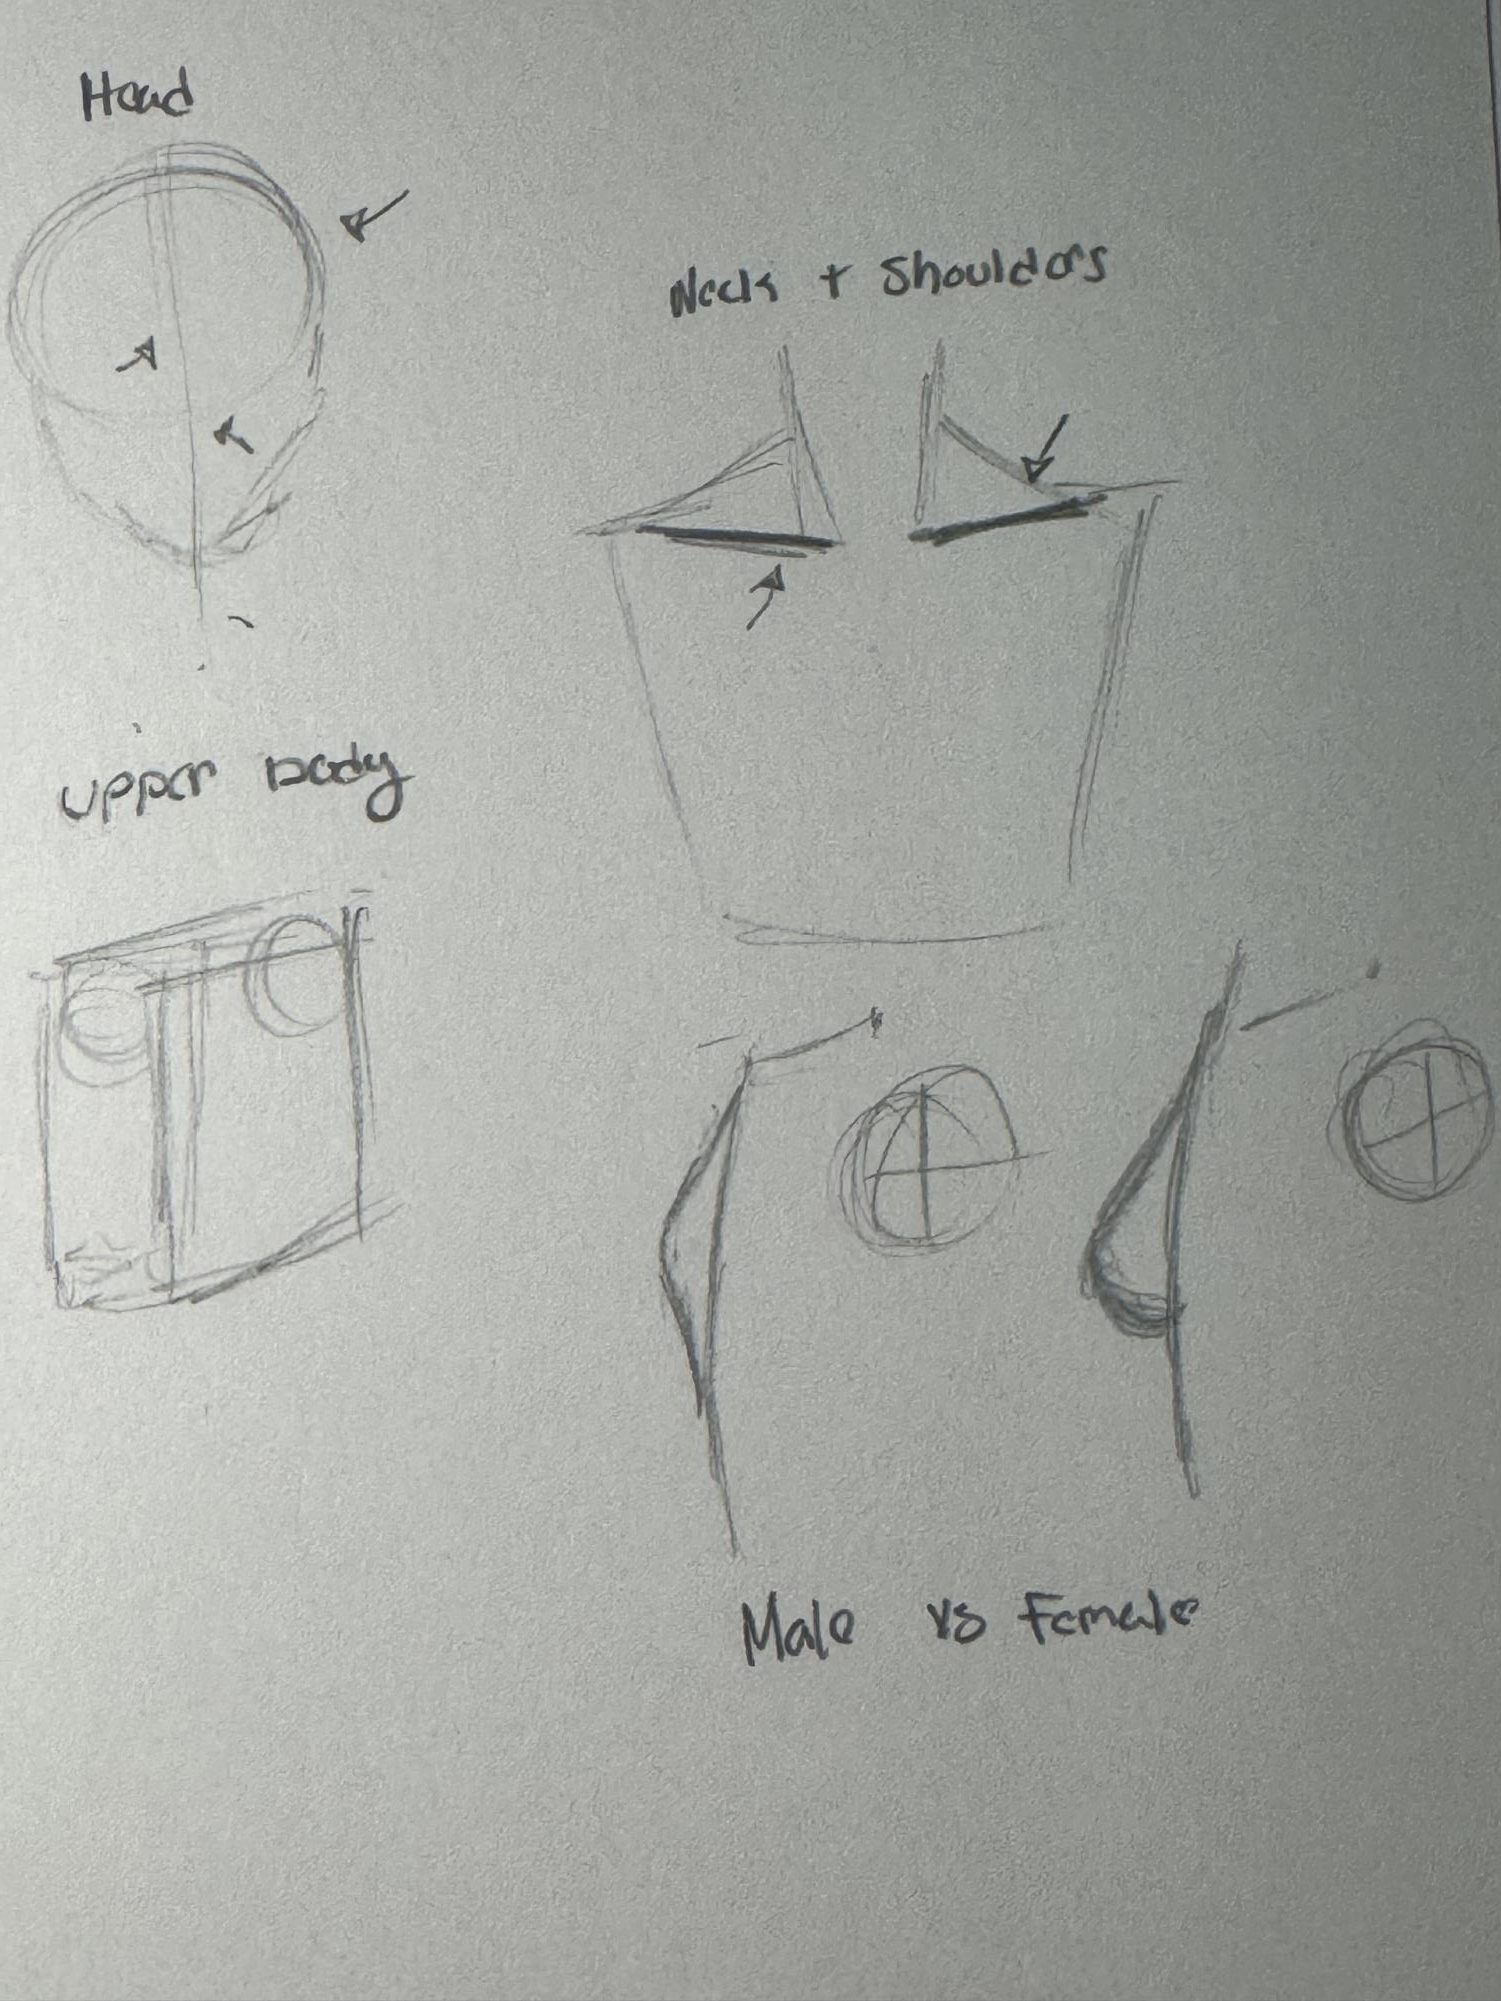
Head: Use lightly sketched circles to create the base of a skull. Lines of symmetry (a vertical and a curved horizontal line drawn through the head) are helpful to keep facial features and body parts aligned.
Neck and shoulders: The collarbones determine how the arm and shoulder muscles are positioned, so identifying where they are, even if not noticeable, helps to perfect upper body position. For example, raised arms or a slouched posture. The collar bone also makes a slight appearance near the shoulder and neck, and drawing the indent of the bone creates a more realistic feel.
Upper body: The best tip I’ve gotten is to think of the upper body as a box. Drawing 3D shapes can improve your drawing abilities. If you draw a box at an angle, you can pinpoint how the torso would twist, and where the shoulders are (using circles), even if they aren’t going to be in the final piece.
Male vs female chests: When drawing pectoral muscles for males, they are typically more lifted than for females since they are mostly muscle, while females’ are mostly fat. For females, a teardrop shape is desired. Papillas are drawn further apart for males and more centered for females.
General: When starting any drawing, it is best to sketch lightly to give yourself the ability to erase without any leftover lines. If you struggle to keep from drawing boldly, shift your hold on the pencil back or eject more lead out of your pencil to give yourself less control.
Don’t beat yourself up if your draft doesn’t look good. I always start with a sloppy sketch, then I go over the sketch to add clear details and tidy it up. Happy drawing!


