Now that we are in the month of December, I get so excited when I start seeing vendors selling christmas trees and neighbors putting up their christmas lights. Since this is my absolute favorite time of year, I like to go above and beyond when it comes to decorations. Since I understand that to some it seems ridiculous to spend so much money on decor you will only use once a year, I think it’s smarter to make them yourself. It’s also really fun to make them and you can make them while you watch a christmas movie; I do.
Here are 3 affordable DIY Christmas decor:

Snowman Lights:
1. Take a round fake candle light that you have to switch on.
2. Use a sharpie and make two dots that will be the eyes of your snowman above the fake flicker, and put about 6 little dots below the flicker that will create the smile.
3. Buy a pack of colorful pompoms. Get a medium sized red pompom and super glue a white small sized pompom on top of the red on. This will be the snowman’s santa hat. Then glue the hat to the rim of he candle light.
4. Get one red and green pipe cleaner, and Twist them both together. This will be the snowman’s scarf. Once they’re twisted, use a pair of scissors to cut about 2 or 3 inches off. What you cut off will be what you use for the scarf.
5. Take the “scarf” and make one end of it overlap the other end. The excess you have hanging out, bend that downwards. Don’t leave it straight. It should look like it’s flowing down, as a normal scarf would.
6. Use any type of string, as long as it is sturdy enough to hang it on the wall. Hot glue the ends of the string so it looks like a loop. Then glue the ends of the loop to the back of the candle light and hang it up.
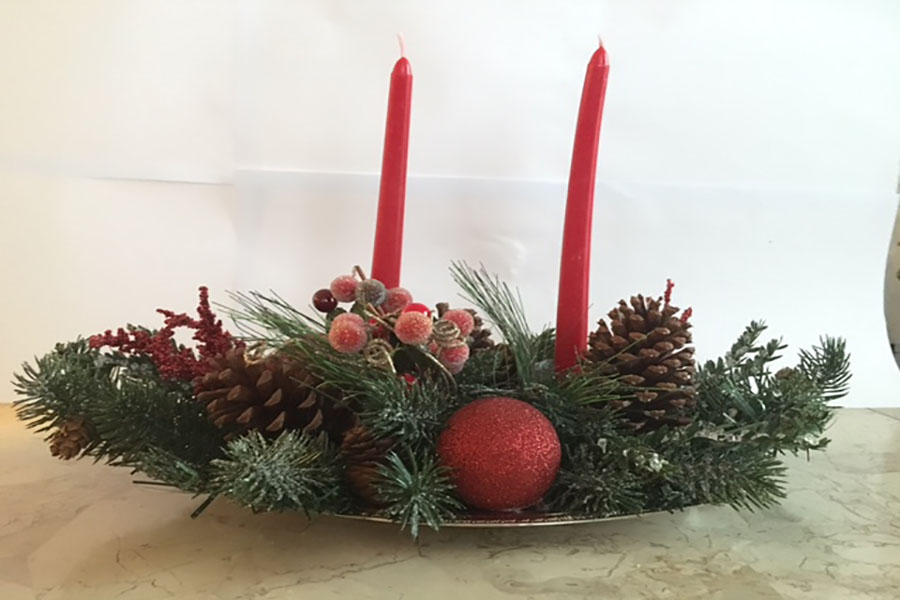
Christmas center piece
1. you’re going to need a plastic tray, fake pine tree branches, pine cones, 2 long candle sticks, a glue gun, ornaments and basically anything that gives a Christmas feel. You can decorate this center piece to your discretion. So feel free to change anything.
2. Take the pine tree branches and glue them to the tray. Make sure that you leave two spaces in which you will glue the two candles. The pine tree branches will be like our cushion for everything else. I’d make sure that the whole tray is covered.
3. In thee middle of the tray where you should’ve left two spaces bare, take your glue gun and glue the candles down. Make sure its sturdy. I had to keep piling on glue until they were secure.
4. You don’t have to glue these down, you can simply put them on top of the branches. Take the ornaments, and pine cones and place them wherever you find it suitable for them to be.
5. Put your new Christmas center piece in the middle of your counter or dinner table!

Mini Christmas Tree
1. You’re going to need a pine cone from your backyard or park, a small flower pot, a paint brush, small pompoms and gold (or whichever color you want) acrylic paint.
2. The pine cone will be our christmas tree. Take the pine cone and paint it silver. If you want to paint the “christmas tree” green and not silver go ahead.
3. Once the paint is dried, take pompoms and glue them with a glue gun to the pine cone so they can act as ornaments.
4. If you want your christmas tree to have a star on the top of it, take a yellow pipe cleaner and bend it to make it look like a star.
5. Glue the rim of the small flower pot and stick on the pine cone.