How To Retwist Locks At Home Tutorial
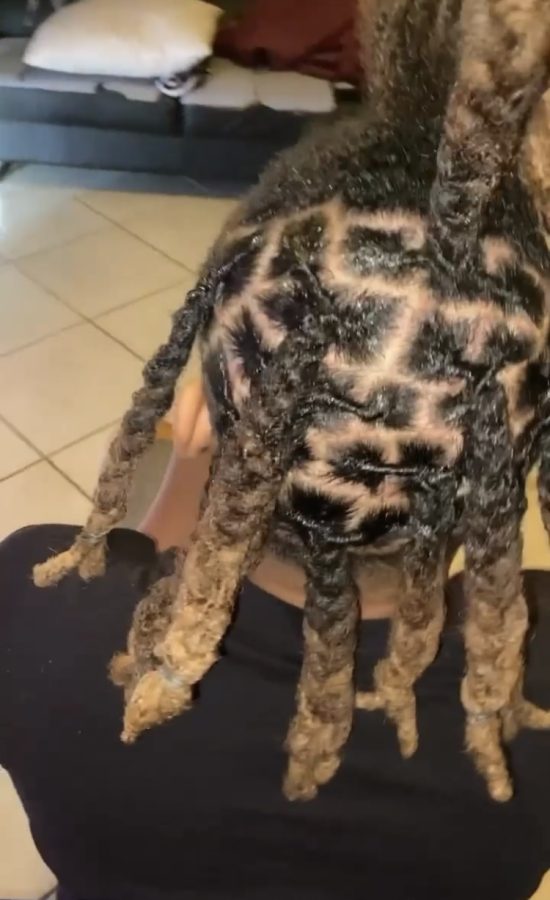
An example of the locks.
September 15, 2022
Step 1: Gather your supplies
These are just some of the things I personally use when retwisting dreads and by no means am I professional of any sort. So before you start here are the basic things you will need:
- A rat tail comb
- Edge brush ( optional )
- Twisting gel ( any kind of your choice )
- Hair clips
- A blow dryer ( optional )
- A Durag/Bonnet
Extras: Rubber bands, hair ties, a spray bottle, and holding spray ( preferably Spritz or got2b hairspray )
Once you have everything you need, you’re ready to start preparing your
Step 2: Wash your locks ( optional )
Now for those who have beginning locks or have locks that aren’t ready to be washed, you by no means have to wash your locks, this is just an option; however, for those who can wash their locks, I highly recommend doing a hair detox to get all of that dirt and build up out, so that it doesn’t fuse with the products that will be used when retwisting your locks. A very common dread detox is apple cider vinegar, baking soda, and water.
Step 3: Apply twisting gel onto the new growth
Using the rat tail comb from the list of supplies shown, part the new growth locks toward your existing locks and keep doing that until you get a good enough part. Then, you are going to want to add your twisting gel from earlier onto the scalp and part the hair again to get that nice clean part. Once you’ve done that you’re going to grab onto the loc and the new growth with your thumb and your index finger, you’re going to twist your hair in a clockwise motion until the new growth is firmly wrapped around your loc.
Step 4: Secure the locks with a hair clip
Once you have that firm grip on the hair, you’re going to grab the hair clip with your other hand and place it on the new growth at the very root of the hair. Now, if you feel the hair starting to loosen, you can double clip it by adding another clip where the new growth stops to get that full locking experience, but one should be okay.
Step 5: Dry your locks (optional)
Now personally when I’m doing locks after I finish retwisting the hair and adding the hair clips, I spray a holding hair spray onto the hair to give it a firmer hold and then the hair to air dry on its own because it saves time for me and the client; however, if you’re in a rush, grab your hair dryer and dry the hair from the root down until the hair is completely dry.
Step 6: Remove the hair clips
Once the hair is dry, take out the hair clips, carefully making sure you don’t tug at any of the hair. To take it a step further, you can moisturize your hair with your favorite hair growth oil. Make sure you put on that durag or bonnet from the beginning to not ruin our hard work. Then you’re done.