Living in Florida it’s extremely satisfying when you see even the slightest shift in weather. Recently, we had a little bit of a cold front and everyone was excited to feel even the a little bit of fall in action. So when fall comes around, and even a bit of leaves turn yellow and red, I’m the first one to make sure my house decor goes accordingly with the weather. None of these 3 decor pieces cost more than $5 each.
Here are 3 affordable DIY Fall decor pieces that even a student saving money can make:
 Viri Reyes
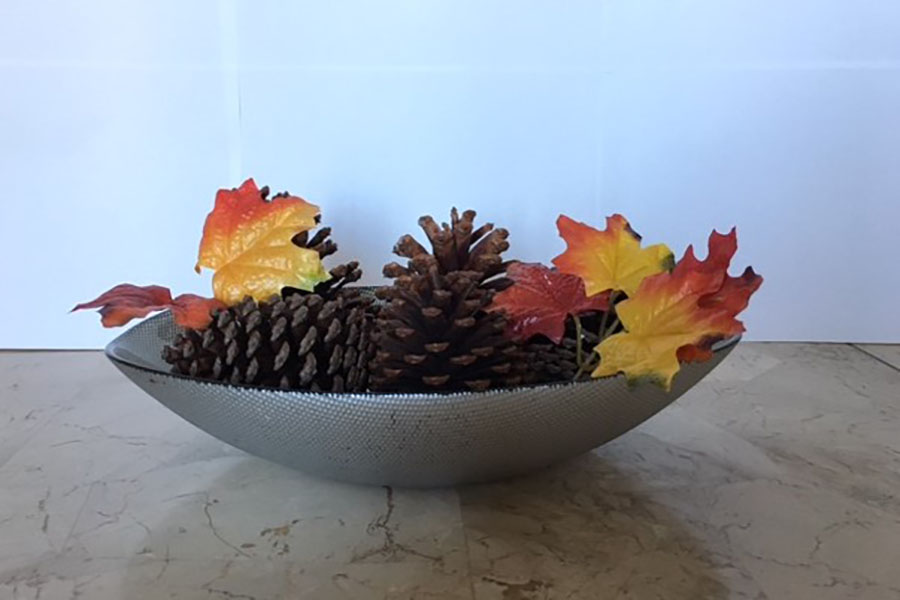
Cinnamon Scented Pine cones
1. Grab some pine-cones. If you don’t have a pine tree, don’t worry you can just go to a park and get as many as you want.
2. Put the pine cones on an oven safe tray. Put them in a preheated 200 degree oven for about 1 hour. This will make the pine-cones open up more. Then wait for them to cool before proceeding.
3. Put your cooled pine-cones in a bag and put a few drops of cinnamon scented essential oil and just a bit of water into a spray container and spray the pine cones. shake the bag up to make sure every pine-cone gets coated. Leave them in the bag for about a week to make sure the pine-cones absorbed the oils.
5. Put the pine cones in a decorative bowl. To add more of a fall look, buy fake fall leaves and put them in the bowl too.
 Viri Reyes
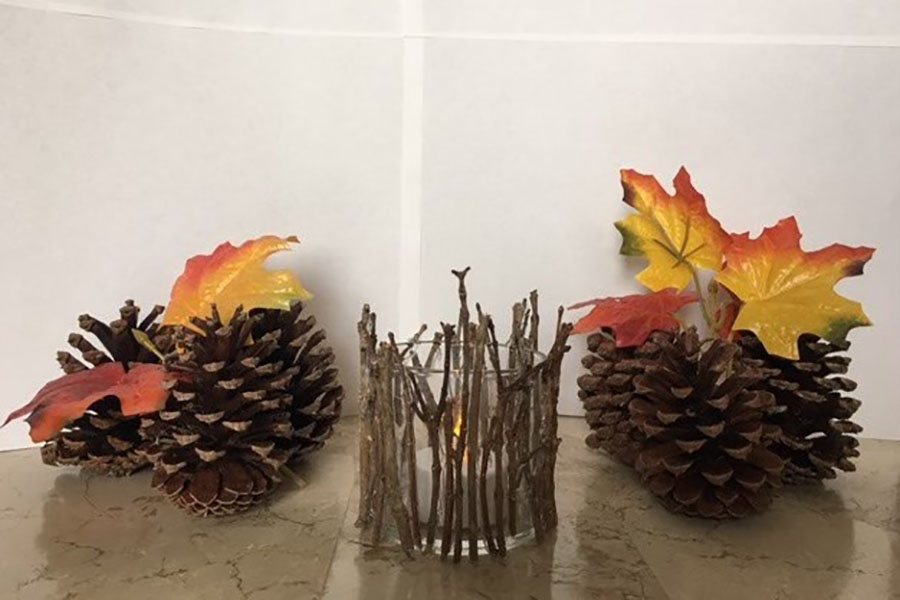
Tree Branch Candle holder
1. I used an old candle and carved out the excess candle wax so that I was just left with the glass and used that as my container.
2. Grab stick branches from your backyard or a park. Preferably small broken off sticks.
3. Grab the pieces of sticks (or cut the branches to your discretion, making sure they fit accommodatingly to your holder), hot glue them on to the sides of the candle holder. It will probably start getting messy because of the strings of hot glue gun, so before you pull them off, make sure the sticks are glued down.
4. Lastly, put whatever you want in your new holder. You can put a candle in it, or makeup brushes. Whatever you’d like.

Falling Leaves Globe
1. Get a mason jar (I got mine at the dollar store) and a small enough stick that will fit in the mason jar closed. Make sure your stick has some type of structure that resembles a miniature tree.
2. Buy some fake fall leaves (I got mine from the dollar store too), cut them up into little flakes that will resemble leaves. Cut them up until you have enough to fill up the base of the jar. Put them aside.
3. The inner flat lid of the mason jar is what your tree will stand on. Use the glue gun to glue the “tree” in the middle of the lid.
4. After you glue the tree, use the excess leaves to your discretion and glue some to the tree branches. The fake leaves I got came with little balls, so I glued those to the branches too.
5. Fill the mason jar up with water until the whole “tree” is covered. Before gluing, make sure you put the leaves you cut up in to the mason jar. I also put some gold glitter into the jar.
6. Before you close the jar, super glue the inner lid to the jars rim just to be sure no water will spill out. Then, make sure you screw the top lid on tightly.
7. Shake up your new falling leaves globe!